Pages - Menu

Showing posts with label Primitive Pumpkins. Show all posts

Sep 5, 2019

DIY Concrete Pumpkins

DIY CONCRETE PUMPKINS

Hey Ya'll!

Ready to make some concrete pumpkins for Halloween?
I sure am even though it is September 5th.  I've been ready for a few weeks now.
I made these two pumpkins for just about $4.00 each.
And they weigh approximately 25 pounds each!

This is a very simple and inexpensive process, so don't worry much about messing up.

Here's what you will need:
- A 50 pound bag of Quickrete $5.00 (I got from Lowes) Makes 2 pumpkins
-Pam cooking spray or Generic brand like I used "Chef's Own $1.00
-2 Plastic Pumpkins $1.00 each
-Mixing bucket
-Water
-Sharp utility knife
-
.
I didn't have any plastic pumpkins on hand from last Halloween so I first looked around at the local Goodwill.  There I found three of them for only .99cents each.   Sad only because new at Walmart they were 1.00 each. lol. So even though super cheap, I just figured they'd be cheaper for some reason.


Here is a photo of most of my supplies.  Notice there are three pumpkins I had ready.
Well, I found out quick that a 50 pound bag of Quickrete concrete mix only makes 2 pumpkins!
Yes that's right.  So each pumpkin after done will be approximately 25 pounds right?


I used an old Lowes plastic 5 gallon utility bucket for mixing the concrete in.

Here's my trick. Since the bag is so heavy and awkward to handle, I sit it on the back of my truck's tailgate.  Then I slit a whole into the bottom, corner of the bag and let it freely pour directly into my bucket.


This is so much easier than handling the bag so many times, adding a touch more and so.


Don't mix it too runny!  Read your bag for best instructions.


Here is a very important part!
Right before you begin to pour your concrete mix into your pumpkins, 
YOU MUST SPRAY THE INSIDES GOOD 
with a coat of the PAM or Generic cooking spray.

This will coat the insides and allow the concrete to release easier later on after drying.


I used a plastic, kids shovel I had on hand for dipping the concrete out and into the pumpkin.


I tried to keep it from coming out.
But it was hard because after you fill up your pumpkin, 
you must keep lifting it up and tapping it down on the ground 
to release any air bubbles trapped inside.
Do this over and over a few times.


You can always take your hand or cloth and wipe away the excess right at the rim.

Now comes the hard part.....
You must let them sit for about 24 hours before you start to cut the plastic buckets.


This is how I made my cuts.
I did four slices, top to bottom very carefully.
Try to avoid cutting so deep that it marks the concrete.
The concrete of mine, was still not completely set up even after 24 hours.


And then you slowly peel them back.


And then the concrete pumpkin will finally begin to emerge completely out of the plastic.


And this is it.
This is my very first try at making a Concrete Pumpkin.

I did let them sit another 24 hours after getting them out of the plastic before handling them too much.

You can see the holes in the concrete where air was apparently still trapped.

But for my purposes they are just fine.
I've read about a countertop mix available at Lowes that allows for a super smooth finish.
But for me just wanting them to sit outside as decoration, I don't want to add anything to the mix to make it very expensive.


Here are the plastic buckets after I got the concrete out.


And here it is after it was all complete.
I like the concrete look but on the next one I may do a white, crackle paint finish.

Sep 1, 2017

HALLOWEEN MASON JAR LID ORNAMENTS


Hey Ya'll.
Who's in the mood for some Halloween Mason Jar Lid ornaments?
I know I sure am!

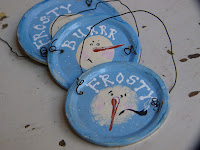
These stemmed off from the idea of my Snowman Mason Jar Lid ornaments you see below:
 SNOWMAN LID ORNAMENTS

 Here's how I made them in case you want to give it a go. 
If you don't have any on hand, here's how they look in boxes at Walmart.
started out with a bunch of plain ole, used, metal Mason Jar lids in two sizes of
Regular: 2 2/4"
Wide Mouth: 3 3/4"
Some were new and shiny, some old and rusty. It doesn't matter to me.
And I spray painted them a base color in various shades of green and maroon that I had on hand.
For the Fall ones I was doing today, I stuck with the Satin Green.
The white was used for speckling (snow) only because it's a cheaper can and doesn't cover good.
Here are the Rustoleum and Valspar that cover great in one coat:


After they dry, they are a flat, softer color. Then we're ready to get started painting with craft paint.
My favorite brand is Folk Art but I do have a lot of Apple Barrel on hand too.

I just kinda looked at some magazines I had on hand to get ideas of decorations for the pumpkins.
And then just free handed the rest. Any fall or Halloween themed ideas would work great on these!


After letting all the paint dry for a bit, I decided to start adding the wire hangers.

I happened to have a metal punch on hand, but you can easily use a hammer and a nail to punch a hole in each side for a wire.

Then I took some homespun pieces I had laying around, in as close a match as possible and just tied them on.

And here they are all ready to go in my co-op and my ebay shop.

On this pumpkin, I used Elmers Glue underneath a quick off white color to give the almost crackle look.


Happy Crafting Ya'll,
~Lisa

Sep 12, 2016

Ragball Pumpkins


 I purchased a dozen of these drying rag balls, made by the Good Year car brand from the auction last Saturday for $2.00.  So I have about 16 or 17 cents in each.
They are made to use as a drying rag ball for windows and such.  But as soon as I saw them I had other plans. I pictured them as cute little primitive pumpkins because of their shape.

So as soon as I got home with them, I got out my 
-JUTE TWINE
-Manila Tag Labels
-Wooden Ice Cream Spoons
-Scissors
-Few Sprigs of Pip Berry Garland
-Old Crow Stamp and Ink
-Brown Craft Paint
I first painted my wooden ice cream spoons a brown color to make them look like little stems.
And I tied some jute string around them and just stuck them inside the little rag ball.

I noticed some had dis-colorization on the tops. I bet this is why they were cheaper.

Then I used the Manila tags, stamp and ink and stamped up some cute tags to tie on them.
I thought an ole crow would be Halloweenish~.

And then I just put it all together.


And I put them in a brownish/yellow colored enamel pan for display.


I think I am going to price these for $3.00 each in my local co-op craft booth.
Not a bad profit for an item that ended up costing me about 16 cents each! And I got a case of 12. 
I so wish I would've gotten more now! Ah, maybe next time.

What do ya' think? 
A fair price?

Happy Crafting ya'll,
See ya' next time,
~Lisa


Aug 23, 2016

HALLOWEEN THEMED MINI MASON JARS PLUS PUMPKIN MAGNETS


I've really been in the Halloween/Fall mood this week. And these Halloween themed Mason jars with Pumpkin magnets are a great way to give treats without the use of bags.

Or just a fun way to spruce up any area with a bit of primitive Halloween fun.
And as a bonus, the top, 

the pumpkin face is a refrigerator magnet!


Okay, so on to how to make these.
I stained my jars on the outside, here's the link to how I do that.
 I do the staining because I am in love with various colors that are hard to find.

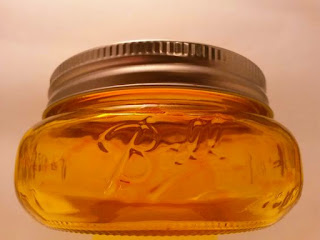
Here is a pic of my orange, hand stained jar:
CLICK TO SEE HOW TO STAIN MASON JARS
 
But I'm sure you could just paint the outside of the jar with a sponge and some craft paint if you wanted. As long as maybe sealing it with a clear coat to save from chipping.

After that, I just got out some craft paint in browns, and painted the shiny lid and ring. 
 The one that will screw onto the jar, not the pumpkin magnet.
I like the burnt umber color a lot.

And then I tied some jute string around the jar with a cute, hand stamped tag. I chose BOO.
 Here it is with the painted lid on it. I had to do two coats of burnt umber.

And then I just stuck on the Pumpkin magnet lid to the top of the jar lid.


And this is how they turned out:
As you see, I also glued a bit of homespun fabric to the pumpkin magnet lid, along with a cute button.
I also added a bit of cinnamon on top of the face, which I sprinkled on top of some Elmers glue. Just to get it to set in.

They are all ready to stuff with candy. 

And remember, since I stain the outside, these jars are food safe.  And since the stain is baked on, they are even safe for washing. Though I'd avoid the dishwasher just in case.

Hope ya'll like these little mini mason jar all decked out for Halloween!
See ya'll later,
-Lisa


SUPPLIES:
I buy the mini Mason jars at Walmart in the canning section.
And the magnets and craft paint I also get at Walmart in the craft section.
The jute twine came from the Dollar Mart and I made my own handstamped tags from the plain Avery tags I found online at eBay.
The swatch of fabric came from my oodles of fabric I've saved over the years. ;-)